Homemade Liquid Laundry Detergent
As we was getting low on laundry detergent it was added to our upcoming shopping trip. Then we got to talking about making our own laundry detergent and wondered how it works.
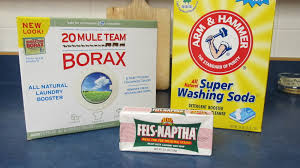 We rustled up a recipe and started. Here are the ingredients we used in our recipe:
1 Bar Fels-Naptha Soap, grated (this can be purchased at Wal-Mart for about 97 cents. Look on the top or bottom shelves as this is normally not at eye-level)
1 cup Borax
1 cup Washing Soda
1-5 gallon bucket with lid (you can purchase these at places like Home Depot)
A long wooden paint stir (we used the stirring extension that goes onto our electric drill)
We have pots and pans that we use for crafts, not cooking. It is recommended that if you make your own laundry detergent to use a pan that you do not use for cooking.
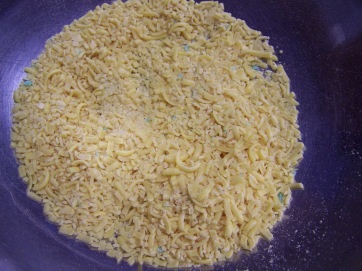 Into the pan goes the grated bar of Fels-Naptha. (The blue pieces are not from the Fels-Naptha. They are pieces of another project and were stuck inside the food processor we use for crafts) Add 6 cups of water.
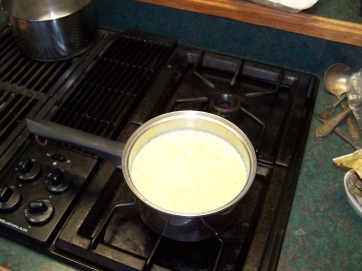 Turn the heat on medium, stir a few times to get the soap completely wet. Wait for the soap to melt. Keep an eye on this so that the soap does not burn or stick to the bottom of your pan. This process takes about 20 minutes.
While you are waiting for the soap to melt:
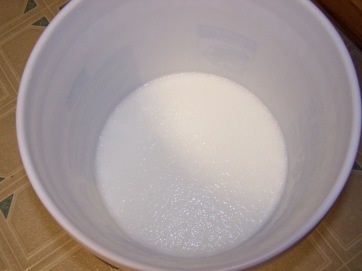 Put the Borax and Washing Soda into the 5 gallon bucket. Add 12 cups of water and stir thoroughly.
Once the soap is melted, add it to the 5 gallon bucket and stir thoroughly. To this mixture add 10 cups of water and stir thoroughly.
The mixture will start to thicken and turn into a gel. This will not be a solid.
Let the mixture sit for 24 hours.
Check the mixture to see what texture you have. If your mixture is a thick gel and you want it more like the laundry detergent you purchase at the store, add more water and stir. Do this until you have the texture of the detergent that you want.
For a large load of laundy use 1/2 cup detergent.
This is detergent does not make lots of suds and that is okay.
When you take your clothes from the washer, they smell very fresh.
**If you want to make your own laundry detergent, you do not need to use this recipe. There are many recipes on the Internet, including recipes for powder detergent. We just prefer to use liquid laundry detergent.***
Vicks Vapor Rub did not work for us
On January 5 our blog was about Vicks Vapor Rub deterring pets from using the bathroom outside the litter box.
Well, it did not work for us.
After taking Abby to the Vet, we learned that her problem was a behavioral issue. Miss Gracie had been attacking Abby right after she finished using the litter box and she no longer wanted to be attacked.
We turned to the ASPCA Remedial Litter Box Training article for tips on how to handle this problem.
At first we did not want to shut Abby up in the bathroom by herself, then we saw that she was much more comfortable of using the litter box in a place she knew that Gracie was not going to attack her. Also, we included a much smaller litter box.
Before we used a large litter box with a covered hood. This prevented Abby from seeing or hearing Gracie sneak up on her. And the covered hood kept Abby trapped in the litter box.
By doing away with the larger litter box, the smaller one allows Abby to have a wide view to look out for Gracie. And the smaller box allows her for more ways to escape. Without the cover, it now depends on how Gracie approaches. And after a few days, Gracie seems to have gotten bored with trying to catch Abby in the litter box.
So far, it has not taken us weeks or months to retrain Abby to use the litter box. Instead, we just has to rearrange a few simple things…the smaller litter box was also cheaper than the larger ones.
And yes, we use less litter and the box is much cleaner even though we cleaned them everyday anyway.
If your cat has started going outside the litter box, first and foremost, take them to the Vet to rule out any medical issues.
If the Vet decides, as well as you, that the cat is experiencing some behavioral issues, visit the ASPCA web site for some valuable tips and techniques to help get your kitty back on track.
And use the Vicks Vapor Rub on yourself when you have a horrible chest cold.
We made “homemade” Lip Balm
This cold weather has dried our lips out something fierce. We were going through lip balm like mad and our lips were still dry and cracked.
Not wanting to spend more money on lip balm, we decided to use what we had and create our own. An experiment of sorts as we had never made lip balm before.
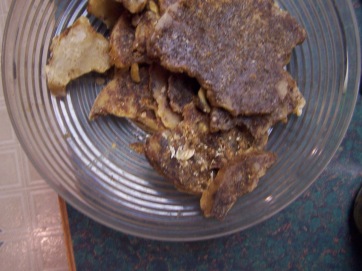 Years ago, a friend gave us some beeswax she just harvested from her bee hives. It was put into the freezer and it has kept well.
The wax still had some honey on it because it had just come from the hives and we did not melt and filter the wax before freezing.
Okay, we had the beeswax. Now we needed oil. Should we use Coconut oil or Olive Oil. There was more olive oil than coconut oil, so we chose to use that. Vitamin E, is on Cindy’s daily list, so a Vitamin E capsule became our preservative, to keep the oil from going rancid.
Flavoring. We did not have any essential oil on hand to add flavoring, so we hoped the honey on the beeswax would help.
There are many lip balm recipes on the Internet, so it is just your preference as to what you want to use. We just used what we had on hand.
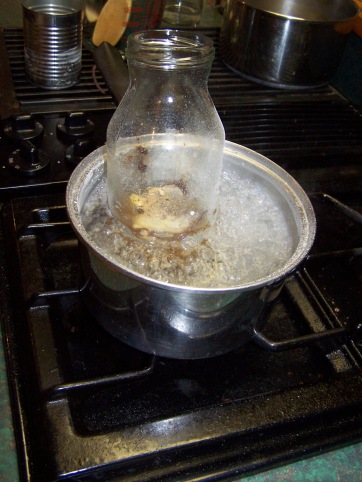 We took a cooking pan, not one we use to cook food in, added water and started heating it up. We took some small pieces of beeswax and put them into a glass jar (think it was a store bought pasta jar) and set the jar in the water making a sort of double boiler or giving the jar of beeswax a water bath. Then we waited for the beeswax to melt. This is a very slow process and you do not want to rush it.
After about 20-30 minutes the beeswax melted and it was time to assemble the lip balm.
We had assembled 1/2 cup olive oil and the contents of one Vitamin E capsule into a plastic container that held fruit (one of those fruit cups containers). To this we spooned, using a measuring spoon that we do not use when cooking food, 2 tablespoons of beeswax and stirred it all together with a wooden stir.
What to put our product into.
When Cindy first got the beeswax, she bought some lip balm tubes and small lip balm containers for making lip balm so we got those out to use.
We needed an eye dropper (the one that is straight worked better for us than one with a curve at the bottom) to use to fill the tubes. It is much easier using an eye dropper than trying to pour hot liquid into a small tube. Once you use an eye dropper for this project, do not use it for anything else. While the ingredients will not kill you, it is better to be safe than sorry, so purchase another eye dropper for giving your children medications, etc.
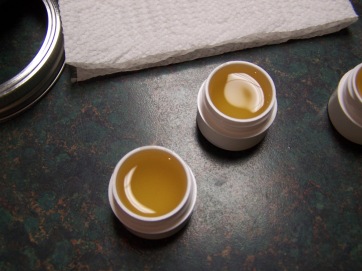 After a few minutes the lip balm started to set up. To be sure, we waited 24-48 hours before we started to use it.
Does it do better than store bought lip balm? The results are not in yet.
We decided since our lips were so dry and cracked that they would probably need time to heal inside out.
Cindy has noticed a slight difference with the amount of dry skin on her lips and she uses it on her hands and has noticed a difference there also. Joe, says it appears to be much better than anything we have ever purchased.
While we know that has been a cost in making the lip balm, we feel it did not cost us anything, because it had been so long ago that the containers were purchased and we often use 100% pure virgin olive oil for cooking and with using only 1/2 cup we did not drain the bottle for this project. And the beeswax cost us nothing.
As for the honey in the beeswax, we couldn’t tell that it left behind a taste. We figured it was probably part of the partials left in the bottle of the jar since we had not filtered the beeswax before or during the making of the lip balm.
While the liquid color is a honey color, when is sets up as a solid it turns out more white.
It is cold here but not as cold as yesterday!
At the time of this writing it is 18 degrees F outside. This time yesterday is was -1 degrees F.
I guess you could say that we are experiencing a heat-wave today 🙂 especially since the weather person says we are to reach 34 degree F today.
If you are in an area of extreme cold weather, please take care not to get frostbite.
Happy 35th to our Son!
Today our son turns 35 years old. Happy Birthday Bubby!
It is hard to believe that 35 years ago today our son arrived in this world. As with all children, he never came with a manual so it was pure gut instinct that got us through because what works with one baby does not necessarily work for another.
Joe was an only child and not around smaller children to much. I am from a large family and there was almost always an infant around that needed to be cared for. So, I had plenty experience of changing diapers and feeding an infant before our son was born.
Looking back, it doesn’t seem all that long ago, yet it is. Even though he is now 35 years old, he is the only child, and will always be our baby.
Pet pee deterrent
I came across this web site Dumb Little Man and read about Vicks Vapor Rub and how it is suppose to deter pets from peeing in places around the house.
Miss Abby has a tendency to pee and poo in two places near the fireplace in our formal living room. I put a litter box in one spot and now am going to try the Vicks Vapor Rub in the other spot. I hope it works.
I will report on this from time to time as Abby has been know not to pee or poo in these spots for several days before she starts again. So, hopefully, I will know in a month’s time if it works for her or not.
Keep your fingers crossed!
